目次
- 1 1. Common Challenges
- 2 2. Salesforce Data Sharing Model
- 3 3. Solutions to common issues
- 3.1 Issue 1: I want to show this information to Department A, but not to Department B.
- 3.2 Challenge 2: Managers want to be able to see their subordinates’ data.
- 3.3 Challenge 3: Apply different data sharing policies across the global organization
- 3.4 Challenge 4: Only members of that department should be able to view and edit data.
- 4 5. Conclusion.
Salesforce offers flexible data sharing settings to efficiently manage business processes involving multiple departments and teams within a company. However, without the proper settings, there is a risk that data will not reach those who need it or be visible to those who do not need it. This article details how to properly manage data by department and team using organizational sharing settings, role hierarchies, and sharing rules to make it easy to understand for those unfamiliar with Salesforce.
1. Common Challenges
1.1 Mismatch in data visibility between departments or teams
- Some data is visible to Department A but not to Department B.
- Managers want to be able to see their subordinates’ data, but do not want their colleagues to share data with each other.
Example: A sales department wants to limit data access to teams by region, but wants to share only specific business meeting information with the entire team.
1.2 There are no clear rules on who can manipulate which data.
- Risk of data being disclosed more than necessary and unintended changes being made.
- Some teams cannot access other teams’ data, resulting in work stoppages.
Example: support team cannot see customer information and cannot provide efficient support.
1.3 Complex requirements in a global organization
- Different data sharing policies need to be applied in multiple regions and countries.
Example: In the EU, GDPR regulations do not allow teams outside the region to access the data, but they want to share data freely within the US team.
To address these challenges, you need to understand Salesforce’s data sharing model and configure it appropriately for your situation.
2. Salesforce Data Sharing Model
Salesforce manages data sharing in three primary ways
2.1 Organization Sharing Settings
- A mechanism for setting up basic data sharing rules.
- For each object (e.g., account, business meeting, case, etc.), one of the following can be set
- Open/Reviewable/Updateable: all users can view and edit the data.
- Public/View Only: All users can view the data, but not edit it.
- Private: Only the record owner and users in higher roles have access.
Application example:.
- Set account data to private and set individual access rules in the sharing rules or role hierarchy.
How to set up:
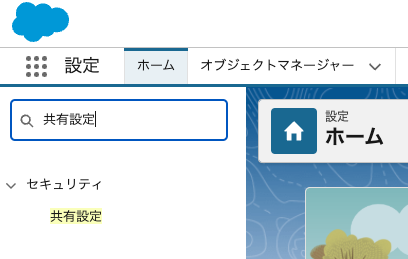
- Click on the gear symbol in the upper right corner of the screen and click on “Settings.
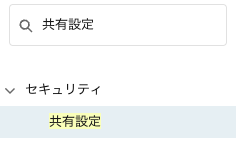
- In the quick search, type “Sharing Settings” and click “Sharing Settings”.
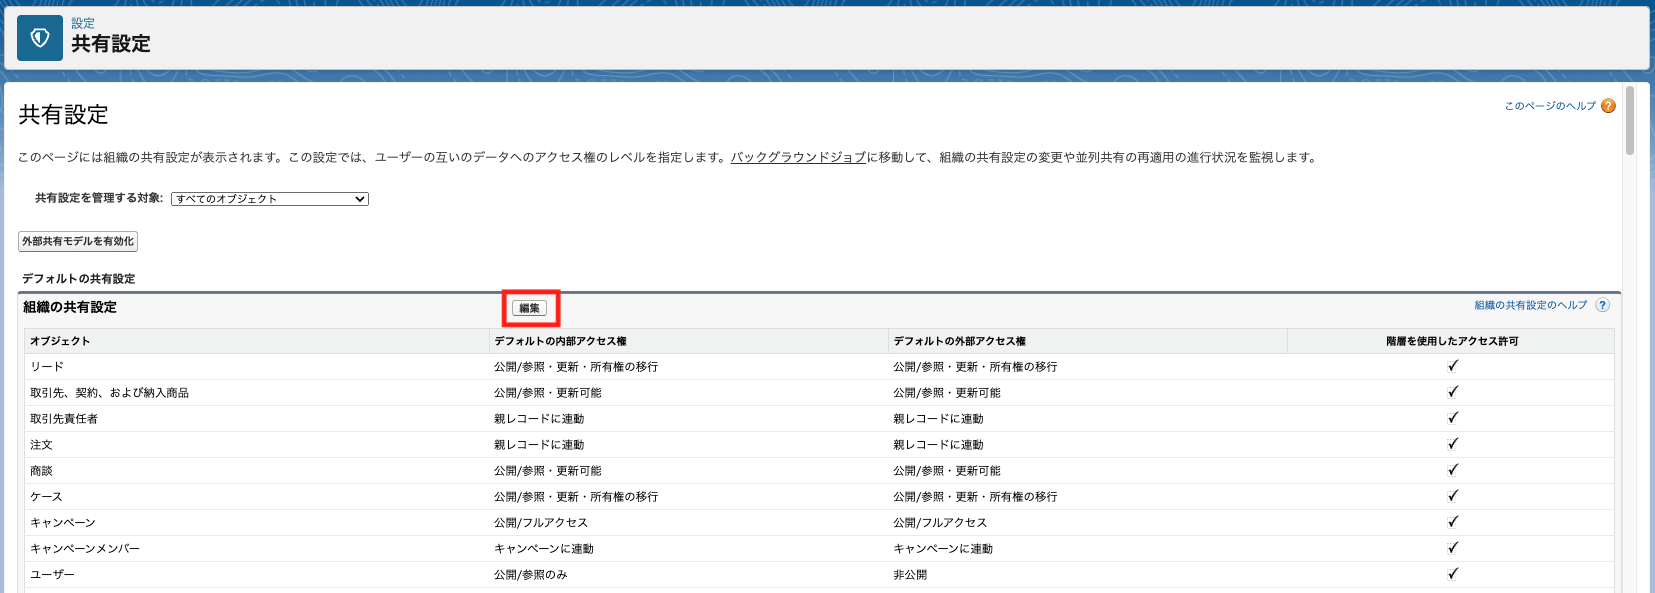
- The public status of each object will be displayed on the screen.
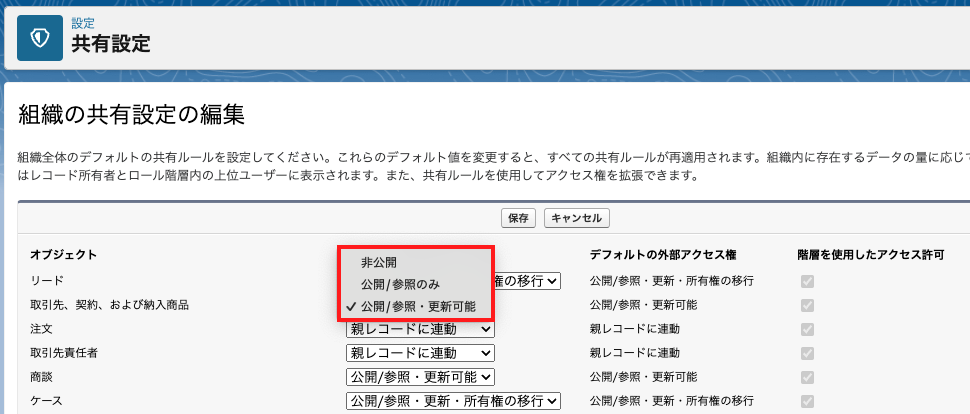
- Click “Edit” and select from the choices the publication status of the object you wish to change.
2.2 Role hierarchy
- A system that allows managers to access data of their own subordinates.
- Data can be viewed and edited by users in “higher roles” and by users in “lower roles”. (When the object sharing setting is set to “Private” in the sharing settings)
- When “Private” is selected, only data owned by the user can be viewed and edited, and data owned by other members cannot be viewed and edited.
Application example:.
- A sales manager can check the negotiation data of his/her team members. The data cannot be viewed by other members of the team. (When the sharing setting of the negotiation is set to “Private”)
How to set up:
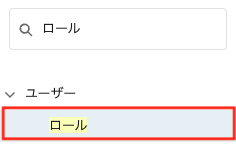
- Click on the gear symbol in the upper right corner of the screen and click on “Settings.
- Enter “Roles” in the Quick Search and click “Roles.
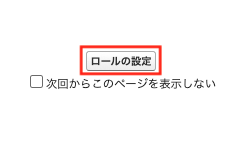
- Click “Role Settings” to view the setting status.
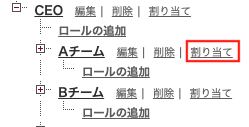
- As shown in the figure below, the CEO will be able to see and edit the data of “Team A” and “Team B” below it.
- Under “Assign,” add a member to Team A.
2.3 Sharing Rules
- A mechanism to share data that meets specific conditions with specific user groups.
Example of application: A sales meeting owned by the East Japan Sales Team is shared with the East Japan Sales Team.
- A business meeting owned by the East Japan Sales Team is granted reference privileges to the Corporate Planning Team as well.
How to set up:
- Click the gear symbol in the upper right corner of the screen and click “Settings.
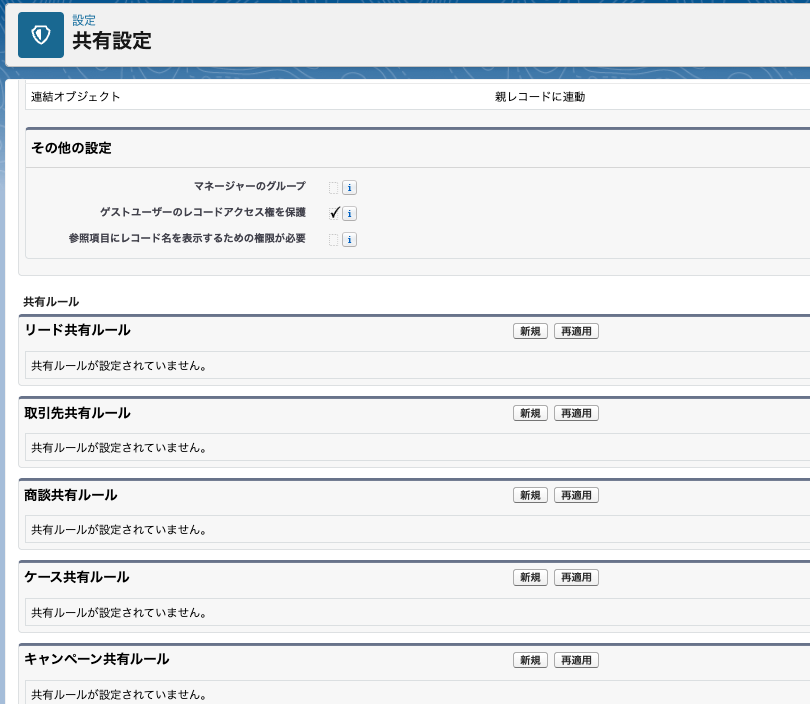
- Enter “shared settings” in the quick search, and click “shared settings.
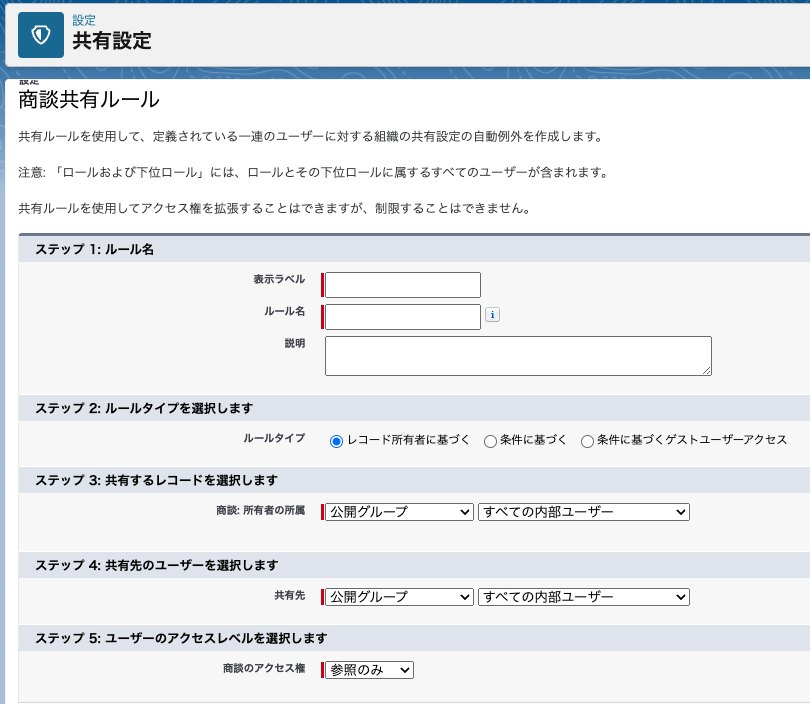
- Scroll down the screen and click the “New” button under “Business meeting sharing rules.
- Step 2: Select Rule Type” is where you choose whether you want to share records by “owner” or by “specific record. In other words, do you want to share a record of a specific someone or a record with a specific value? This means: do you want to share someone’s record or a record with a specific value? Depending on this choice, the subsequent configuration screen will differ.
- Step 3: Select the records to share” is the part where you set who will share the owner’s records if you selected “Based on record owner” above. Select either Roles or Public Groups. Also, if you chose “based on conditions” above, set the conditions for which records will be shared. This means that you set which records are to be shared and which items are to be shared with which values.
- Step 4: Select the users to share the data with” is where you set who the data set above will be shared with. In this case, the data will be shared with the Corporate Planning Department, so we will select a public group or role to share the data with. If you have not created a role or public group, you will need to do so.
- Step 5: Select user access level” is for setting whether the data will be shared with the Corporate Planning Department, but whether it will be “reference only” or whether it will be able to be “viewed and updated” as well.
3. Solutions to common issues
Issue 1: I want to show this information to Department A, but not to Department B.
- Solution.
- Set the Organization Sharing settings to Private.
- Set up a role hierarchy so that managers in Department A can see their subordinates’ data.
- If data from Department A needs to be shared with Department B, set up sharing rules.
Setup procedure: 1.
- Set the account sharing settings to “Private.
- Set roles for each department (e.g., “Sales Manager A” for Department A, “Sales Manager B” for Department B).
- If necessary, create sharing rules to allow data sharing between departments.
Specific example: A company has a sales department that manages product information and a marketing department that manages campaign data, but certain data regarding product sales plans must be shared between both sales and marketing departments. In this case, use sharing rules to set up access appropriately.
Challenge 2: Managers want to be able to see their subordinates’ data.
- SOLUTION: The following is an example of a solution.
- Utilize role hierarchies to allow managers to automatically access their subordinates’ data.
Setup Procedure: 1.
- Set “Sales Manager” above “Sales Representative” in the role hierarchy.
- Restrict access to other departments’ data by setting the organization’s share settings to “Private.
Specific example: For example, to allow the head of the national sales department to see the data of each regional sales team, set up a role hierarchy so that higher roles can access the data of lower roles.
Challenge 3: Apply different data sharing policies across the global organization
- Solution.
- Set up sharing rules by region and country using condition-based sharing rules.
Setup Procedure: Create a condition-based sharing rule based on the “Region” item in the negotiation.
- Create a condition-based sharing rule based on the “Region” item of the negotiation.
- For example, make sure that only the North American team can see the negotiation data for “Region = North America”.
Specific example: In a multinational company, if the US team manages North American data and the European team manages data in the EU, set up sharing rules based on regional conditions.
Challenge 4: Only members of that department should be able to view and edit data.
- Solution:.
- Set the organization’s sharing settings to “Private” and set a role for each department.
- Using the sharing rules, grant each department view/edit permissions to view/edit records.
Setup procedure: 1.
- Set the sharing settings to “Private”.
- Go to Settings > Sharing Settings > Sharing Settings and set the default for the target object to “Private”.
- Set the role hierarchy.
- Set roles for each department in Settings > Roles.
- Example: Department A = “Sales Department A”, Department B = “Sales Department B”.
- Create a sharing rule.
- Settings > Sharing Settings > Business Meeting Sharing Rules.
- Set the rule type to “Owner based” and set sharing for the role of Sales Department A.
5. Conclusion.
Salesforce’s data sharing model is flexible and, if configured properly, can meet complex data management requirements within an enterprise. Set up basic policies in your organization’s sharing settings, manage hierarchical access rights with role hierarchies, and share by exception with sharing rules to ensure efficient and secure data management.
In addition, data sharing settings do not end once they are set up; it is important to review them periodically and take appropriate actions when changes are necessary. Please refer to this article to configure the settings to meet your company’s requirements and get the most out of Salesforce.